The new Bend Beavs Central mobile app is now available. Download it today!
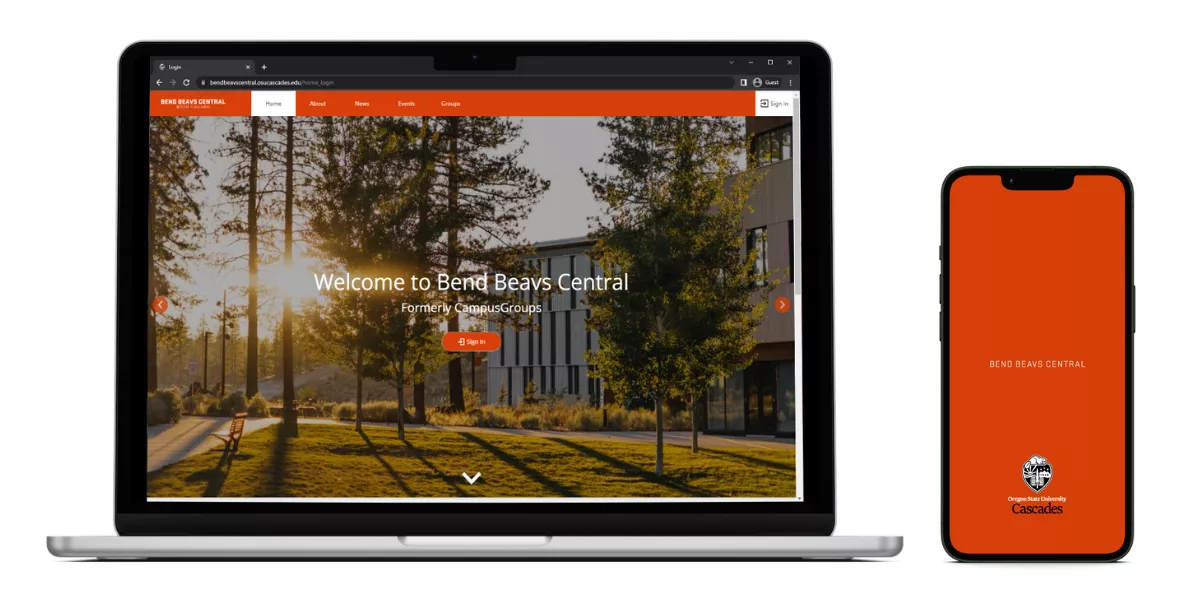
Bend Beavs Central (formerly CampusGroups) is your one-stop-shop for everything OSU-Cascades!
Find belonging through a dynamic feed of co-curricular events, student clubs, career and self development activities, and campus resources.
Bend Beavs Central offers something for everyone! How will you use it?
CampusGroups provides a complete toolkit for groups to manage your activities within a private campus network, where students can connect, share, and get involved. The system provides dedicated access and tools to three types of users.
1. STUDENTS
2. GROUP OFFICERS
Each group (e.g., club, department) has a number of designated officers who can access a dedicated group management area. Officers can use a number of tools
to manage their organization more efficiently. These tools are classified under
specific modules.
3. SCHOOL ADMINISTRATORS
Administrators have access to all of the above, with additional privileges. This includes the rights to modify each of the underlying groups on campus and have access to the administration section.
In the dedicated administration section, you can configure access to the platform, add users or officers, create new groups, email officers, and download lists and reports (e.g., users, officers, events, transactions).
Additional administrative features can include:
New To CampusGroups? Complete these five steps and you'll be ready to go!
Tips to get you started!
You are ready to go!
You can set privacy options for each piece of to be shared with or hidden with others.
4. Deselect any data fields you would like to keep hidden
Here is an introduction to the main features available to group officers.
1. Access your management tools
The Groups dropdown gives you access to all the groups you have joined and allows you to manage the ones for which you are an officer.
2. Manage your team of officers
Add, retrieve, and set up all the group officers under the settings menu. From there, you can administer their permissions and notifications.
You can appoint group officers (Tip: Information entered in the “Role” and “Bio” fields will be displayed on the “Officers” webpage of your club website)
You can also organize an online survey to manage elections
3. Manage your members
Retrieve all your members within the Members menu. Feel free to use our search and filter features to quickly find a particular member.
Members can sign up for your group from the Groups page. You can also add them to your group one by one or several at the same time.
How to add new members to your group
How to import members into your group
Tip: If your group is not set up for Auto-validation, Pending members cannot access your group until they are validated. Approve their registration through the “Members pending validation” notification at the top of the Members page.
4. Create events
Click on the Create Event button in the Events menu to create an event where you can charge a fee and/or offer a free event. Various options are available, including creation of multiple tickets, time slots, and waiting list.
How to create an event
5. Communicate with your members
Communicate easily with your members by Selecting the Emails option. You can compose new emails using mailing lists or email templates and check delivery status.
How to send an email using the email builder
You can also interact and share with all your members by posting on the group feed and adding photos, documents, links, and polls to your posts.
6. Create a form or a survey
Create and share forms or surveys within Surveys & Forms.
Tip: Receive an email notification when a user has sent their submission using the Notifications feature within the settings of the form.
Identify differences between surveys and forms
7. Manage your website
Administer, edit, and customize the club website under the Website menu. You can also create news posts and discussion boards.
Getting started with the new website builder
8. Retrieve your group's transaction
Keep track and manage the group’s transactions (e.g., club dues collection, ticket sales, refunds) under the Money menu.
How to use the No Budget module
How to use the Simple Budget module
How to use the Advanced Budget module
9. Manage your media
Store and share documents and photos under the Media menu.
How to upload and share a document
10. Change your group settings
At any time, you can change the various settings for your group including the name, contact information, membership fees, access and privacy, and group sign-up options by clicking on Settings.
How to update my group settings
And More:
Manage your group's Inventory
Create custom Checklists and Tracks
Create custom Badges
Set up Connection Programs
Manage Service Hours
Build an online Store
Create custom Event app
Manage your group to create events, send newsletters, appoint officers, and more!
Select Dashboard and then Settings
4. On this page, you can change the various settings for your group which include:
5. Select Save
Once you save those edits, they will be applied immediately.
4. Click on the Compose Email button to the right
5. Select recipients and click on Compose email for selected group"
You will be redirected to the old email builder.
6. Click on the Try the new email builder button to switch builders
II - Compose an email with the new Email Builder
The new Email Builder is separated in six steps. You can easily navigate between them using the convenient bottom menu.
Click on Next when you are done with a step, or directly on the following step.
1. Recipients
This step allows you to review the list of recipients, add hidden recipients, paste a list of comma-separated emails, or send a push notification upon sending.
2. Setup
The next step lets you add a subject, choose the address from which you will be sending the email, and add an introduction to your email.
3. Template
You will be able to choose an email template. Clicking on a template will automatically send you to the next step.
4. Design
With this step, you will be able to customize your email. Drag and drop any elements from the right panel to add it to your email.
Then, click on an element on the left panel to edit it.
The right panel will be replaced by an editing view of the element you clicked. Click on Save when you are done.
It is also possible to add dynamic content to the email. This content allows you to automatically pull data from the CampusGroups platform and is constantly regenerated to stay up to date. Examples of dynamic items are:
To save this design as an email template and make it available under the previous Template step, click on the Save as Template button on the top-right corner.
5. Clickboxes
The Clickboxes step allows you to add different types of Clickboxes to your email:
6. Delivery
The last step is used for delivery options, such as email delivery date, comment management or email previewing.
4. Click on Create Event
5. Choose an Event Template
6. Click Next
7. Populate the required information
8. Click Save
You can view our many articles for more information on what can be done when creating an event.
Forms in CampusGroups can mirror and replace a classic paper or PDF form which allows you to collect information and to make a decision for each submission/user on an individual basis.
4. Click on Create
5. Click on the Form icon
6. Personalize your form to include a title and an introduction
7. Add your questions
Note: You can add as many questions (and types of questions) as you want:
8. Click on Save when you have completed adding your questions
9. To see the results of your form, click on the title
10. Click on Stats to access statistics, answers ratios, and date/time of answers
4. Click Create
5. Click on the Survey icon
6. Personalize your survey to include a title and an introduction
7. Add your questions
Note: You can add as many questions (and types of questions) as you want:
8. Determine the Settings for your survey
9. Click Save
10. To see the results of your survey, click on the title
11. Click on Stats to access statistics, answers ratios, and date/time of answers
Live attendance data is collected and uploaded to your CampusGroups account, allowing you to maintain attendance records, control event access, measure interest and ROI, boost users engagement and monitor campus activity. View, monitor, analyze and access reports on your data in real-time, at any time. Transform your computer, iPhone, iPad or Android device into a portable attendance tracking tool.
4. Click the Manage button on the appropriate event
The Manage Event page allows you to directly check in attendees.
5. Scroll down to the attendee list
6. Click on Check-In
Note: You can also cancel the Check-In from this view by clicking on the X icon
To set up additional, more elaborate attendance tracking options"
7. Click on Track Attendance
From there, you can track attendance in four different ways:
I - Manual tracking with a computer
2. Enable/disable RSVP'ed at the door or Multiple Check-Ins
3. There are two ways to check in attendees with a computer:
a. Search for the student with the search bar an click on the user's name
The user has been checked in.
b) Plug in your USB Barcode Scanner and start scanning student ID cards.
II - Self check-in with a QR Code
You will then access the event's flyer with the event's QR Code.
2. Make sure the Activate checkbox of the Self Check-In is checked.
Note: It is possible to have the QR Code refreshed every 10 seconds by clicking on the corresponding link.
Users can refer to these tutorials to Self Check-In with QR Code:
How to self check-in from the event QR Code with the iPhone app
How to self check-in from the event QR Code with the Android app
III - Self check-in in a Kiosk
Please see the dedicated tutorial on How to use Kiosk to track Attendance.
IV - Manual check-in with a smartphone or a tablet
Please see the dedicated tutorials:
How to Check-In people during an event on the Apple app.
How to Check-In people during an event on the Android app.
You can add members to your group by following the steps below:
4. Finally, search a user by typing their name or email address and add them by clicking on their name and then Add
Note: Only clubs should add new users to their group, although clubs are open membership by default. Student Organizations and University Departments should only add officers (supervisors, employees, and student employees) to their group; these groups are closed membership.
4. Select the More the Steps
5. Click on Create Step
6. Populate the required fields and select save
7. Click on Edit Teams
8. Click on Create Team
9. Name your team
Note: Selecting a Dynamic Group will automatically add users as they are selected in your survey. You can set that at the user question level or the group question level.
10. Click Edit Participants
11. Start typing the user(s) name and select Add
*Repeat steps 5-11 as needed
Now that your workflow has been created, you need to assign it to the survey that will be using it.
12. Click on Surveys & Forms then All Surveys & Forms
13. Click on the More icon then Settings
14. Select the appropriate workflow in the Select a workflow template (Optional) field
15. Select Save
Once you have a Workflow that is assigned to you for approval, you will find that in your Workflow section to approve.
3. Select the workflow you would like to approve by clicking on View
4. Click on the "I approve" green button.
Note: If your approval was the last step of the workflow, it will be removed from your workflow list. If not, it will stay until it has been fully approved.
Navigating Bend Beavs Central should be a seamless experience, but when you encounter a minor glitch or need in-depth guidance, we're here to help!
Our on-campus student and professional staff is available to assist you with:
You can contact the OSU-Cascades Support Team at bendbeavscentral@osucascades.edu
The remote CampusGroups support staff is available to assist you with:
You can contact the CampusGroups Support Team at support@campusgroups.com
Whether you're a group officer or platform administrator, our training sessions are designed to provide you with the knowledge and skills needed for effective engagement on Bend Beavs Central. Let us support you in making the most of this dynamic platform. Contact us to schedule your training session today.