Printing your document WITHOUT A RELEASE STATION
PRINTING YOUR DOCUMENT WITH A RELEASE STATION
Are your pages printing in reverse order?
I. Check your Default Print Settings
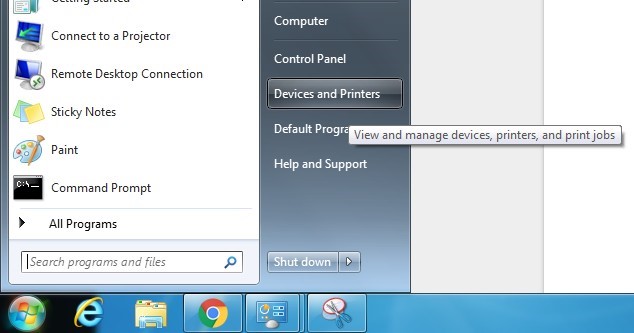
- Click the icon on the taskbar at the bottom of the desktop to launch the start menu.
- Click the tab on the right-hand menu to open the “Devices and Printers” window.
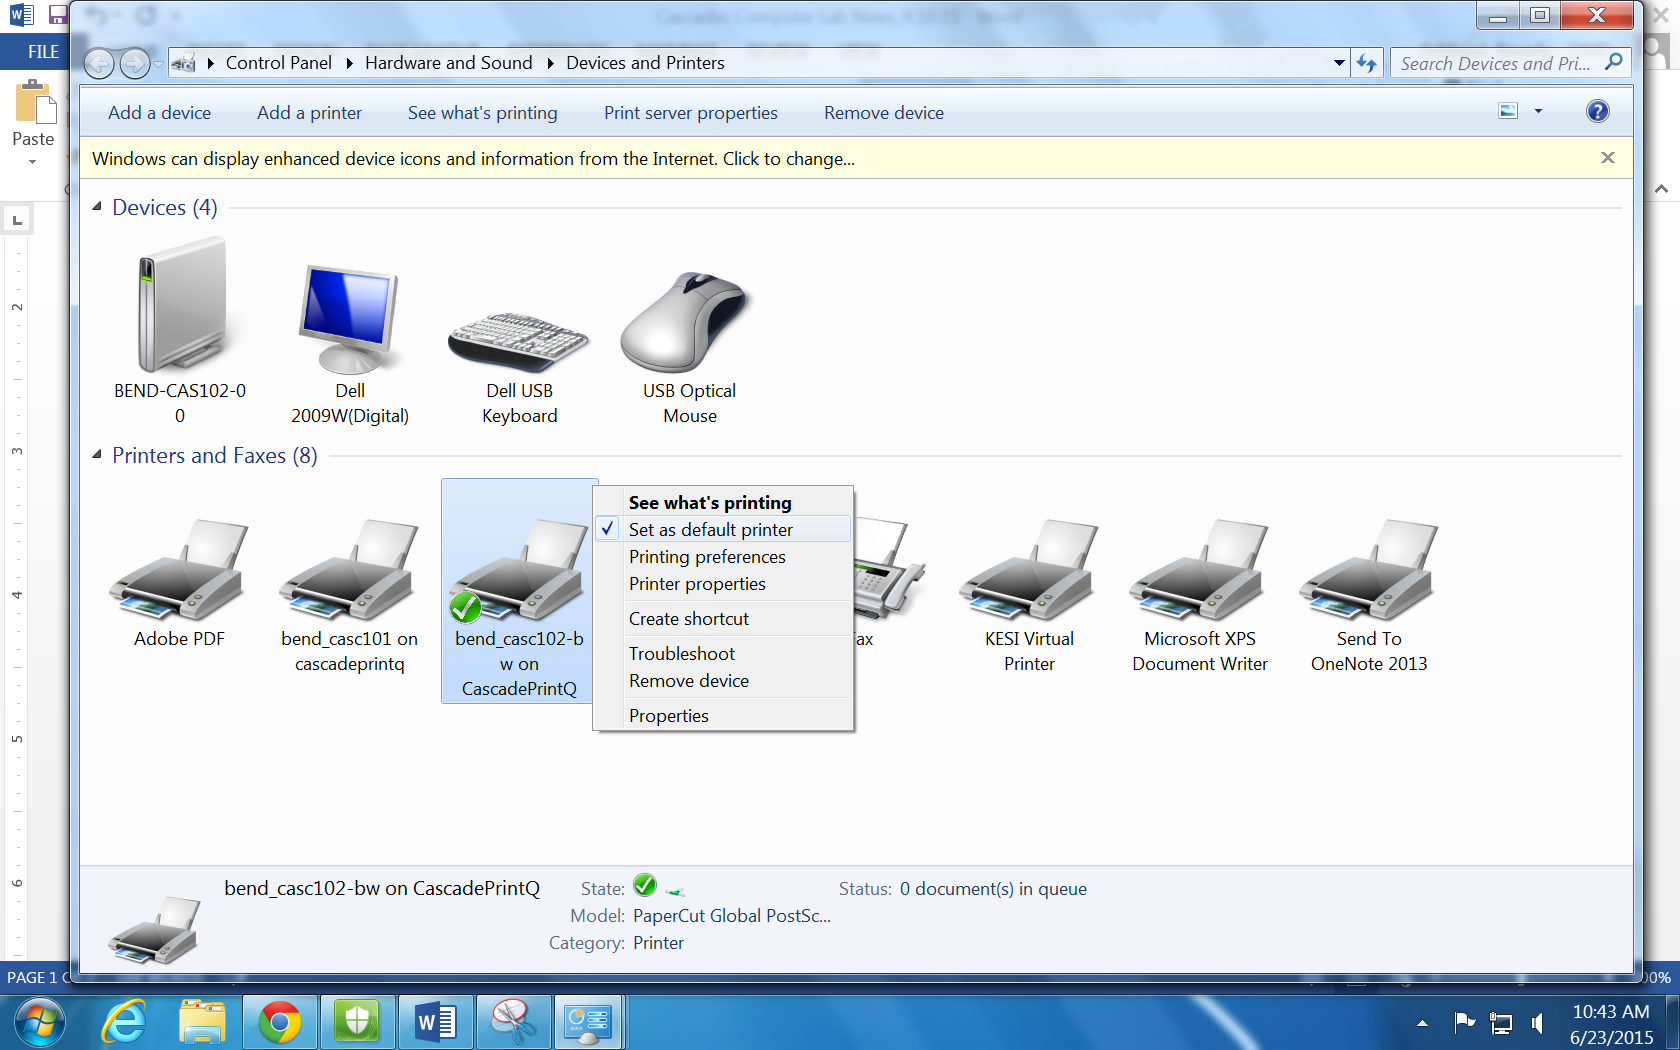
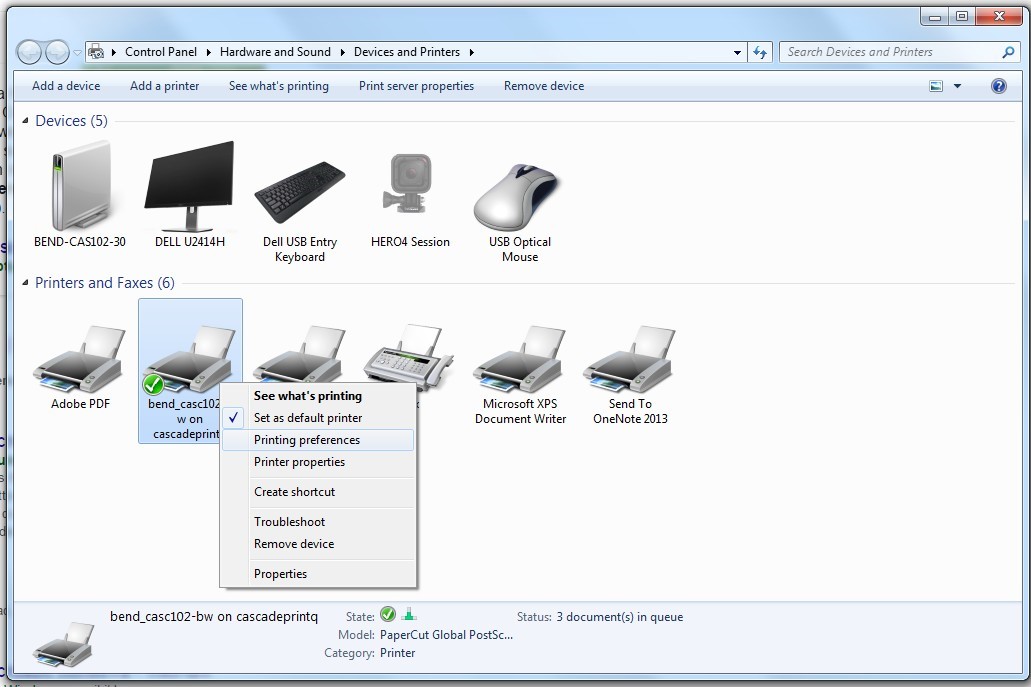
- Right Click the printer you would like to set as default (For example, the black and white printer, bend_casc102-bw) and click

II. Open or navigate to the document to print. You can open a document to print, such as a Word file, or you can navigate to a web page to print. Whichever it is, ensure that whatever you want to print is open and visible on the computer. It is impossible to print if the document to be printed is not open.
1. Printing documents on your computer
- Click File. If there is no Print button, click File and then click “Print.”
- Click Print Preview. If you wish to see what the document will look like once printed, click print preview. (This is an important step for any material being printed from Canvas or the Internet.) You can print from that window or skip this step altogether.
- Click Print. From the File menu, click Print. This will bring up the printing menu.
2. Printing content from a webpage
- Click "Printer Friendly Version" or Printer Icon. If there is no printer friendly version of the page you want, you may need to copy and paste the content into a Word document and print from there.
- Click the “options” or “tools” button. This is located near the upper right-hand corner of the screen.
- Click Print. From the drop down, click Print. This will bring up the printing menu.
3. Choose Correct Printer. From the drop-down menu choose: Bend_casc 102-bw on CascadePrintQ for the black and white printer or Bend_casc 102-cl on CascadePrintQ for color. (Do not assume that the lab computers will always default to the B&W printer.)
4. Change any necessary details. Returning to the print menu, look at the “Settings” box. You will have the option to choose landscape or portrait view, number of copies, single or double side printing, etc. Ensure that the options are set to whatever you desire and match the capabilities of the selected printer.
5. Click Print. Once your settings are to your satisfaction, click "Print."
6. Retrieve Document. Save or keep open the document being printed. Go to the selected printer and retrieve your document. Check to see that it printed correctly. (Since all lab computers print to the same two printers, make sure you have the correct number of pages. It is possible for multiple print jobs to be in the “out” tray at one time.)
- Poor Print Quality. If the document did not print correctly due to a printer issue [no paper, low ink, streaks, poor print quality, etc.], check with the lab attendant for help.
- Incorrect formatting. If the issue is one of formatting, check the printing settings for the document on the computer to make sure they are correct. Make any necessary changes and print again. {For large print jobs, you may want to have a lab attendant check printing settings before sending job to printer. While it is possible to be reimbursed the printing costs for poor quality due to printer issues, you may not be reimbursed for many formatting errors.}
7. Save/Close Document. Once the document prints correctly, save and close the document on the computer. (Be sure to save to a flash drive or your Z drive.)
8. For More Help: Printing documents on your computer
Printing a Word Document
Printing a PowerPoint
Printing to a PDF
9. For More Help: Printing content from a webpage
Printing in Firefox
Printing in Chrome
Printing in Internet Explorer
Are your pages printing in reverse order?
1. Click start >> Click Devices and Printers

2. Rightclick the bw (black&white) or cl (color) printer >>Click “printing preferences”

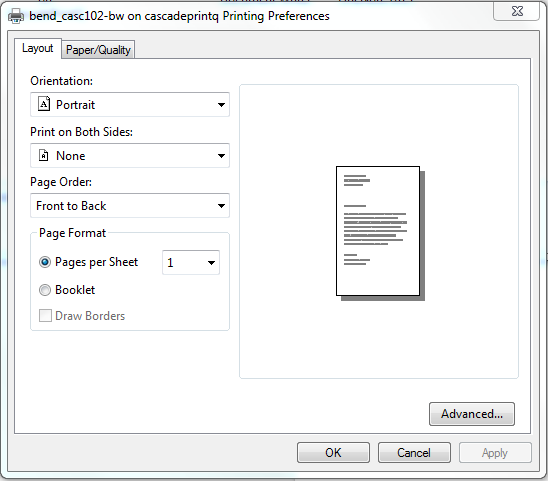
3. Click “Page Order” options arrow >> select “Front to Back” >> Click “OK”

PRINTING YOUR DOCUMENT WITH A RELEASE STATION:
How to release your print job to the printer
At the Printer
Each printer is equipped with a touchscreen and a card swipe.
- Login to the touchscreen by swiping your OSU ID card or providing your ONID username and password.
- Click "Release print jobs"
- Select your print jobs to release
Mobile Release
You need to be on either an OSU device or connected to OSU_Access or OSU_Secure wireless. Using a web browser:
- Visit: https://printers.oregonstate.edu:9192/mr/1102 (color) OR https://printers.oregonstate.edu:9192/mr/2102 (black and white)
- Login using your ONID username and password
- Select the print job or jobs you want to print
- Click release.
QR code:
To use the QR code release you must first install a bar code or QR code scanning app on your device. These can be found on Google Play, Apple, or Windows App stores.
-
At the printer use your scanning app to scan the displayed QR code.
-
It will read the code and display a URL that corresponds to that printer, you may have to click on the URL to open the webpage.
-
Login using your ONID username and password.
-
You will then see a list of print jobs in your print queue on this printer.
- Select the job or jobs you wish to release at that printer and click "Release".
Google Cloud Print
Print and release from your personal device. For detailed instructions visit http://is.oregonstate.edu/service/beaverprint “How do I use Beaverprint with Google Cloud Print?”
***************************************************************************
Note: you can also delete any unwanted print jobs by selecting them and clicking "Cancel". This will permanently delete the print job from your queue.
How much time do I have to release my print jobs?
Print jobs will stay in the queue for 24 hours before they are automatically deleted. You can delete unwanted print jobs directly from the release station as well.